Master Data (Optional)
CloseIn Master Data menu you can upload item data. This process is an optional step. Item Description in scan process will automatically show if you upload Master Data.
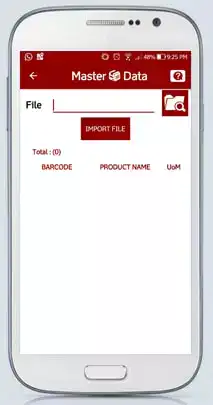
To Upload master data, simply follow these steps
-
Download Template
There is a Master Data template that will be used to upload item data. Tap "Hint" button on the right corner of Master Data Screen to download template.
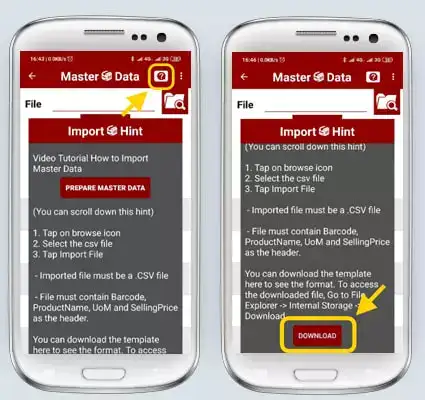
Scroll down Import Hint window to find "Download" button and tap it to start download the template.
Note:
We’ve made some update to provide more information in item master data.
So the CSV file template for Stock Count is changed, please check information below:For Stock Count version 1.56 or before, CSV file template : Click Here
For Stock Count version 1.57 and 1.58, CSV file template : Click Here
For Stock Count version 1.59 and above, CSV file template : Click HereDownload will automatically start, and there will be a notification after finish downloading.

-
Edit Template and Import Master Data
Once you’ve downloaded the master data template, open the file using your Android device or using Computer (PC/Notebook). We suggest you open the file using spreadsheet program in Computer.
Fill in the Barcode, ProductName, UoM & SellingPrice starting from second row (Do not change the header in first row).
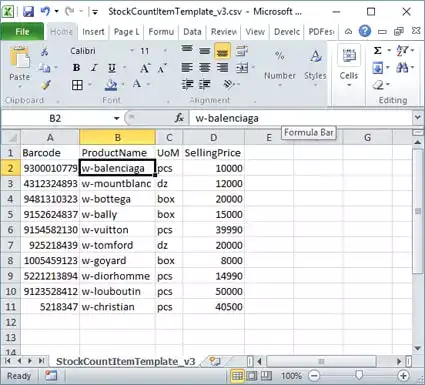
After you finish editing the master data template, save it in two copies. One copy as Excel File, and the other copy as CSV file.
Note: Always save 2 copies of your master data. The excel file will be used if in the future you need to add or update your master data, while the CSV file will be used to upload into your android device.
-
Put your updated master data file into Android Device
Transfer your master data template to your android device:
You can directly transfer the file from your PC to Android device using data cable, and put it inside "Download" folder in your android device.
Or you can send the file to your email account that has been registered in the Android Device, and then download it.
-
Select master data file and import
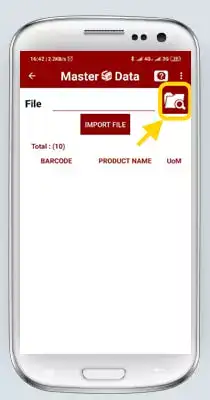
Tap on Folder Icon to start select a file
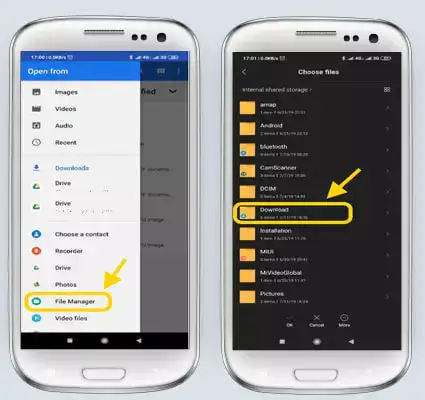
Go to Download folder by choosing "File Manager" - "Download"
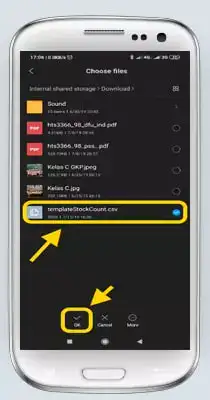
And then select the file
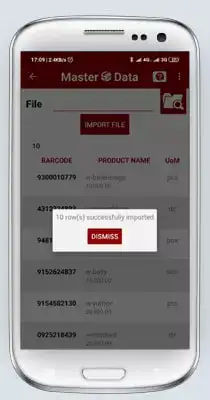
Tap "Import File" button to start import
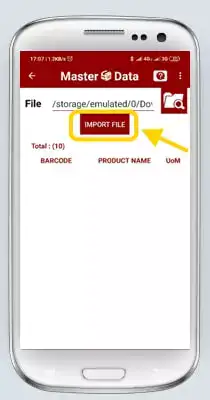
When your import complete, it will show number of row(s) imported, and list of items will be shown.
Start Counting
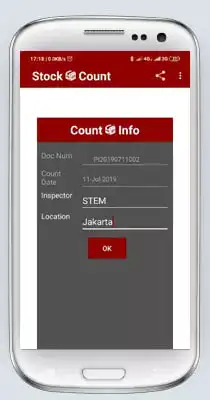
CloseTo start stock taking process tap on "Start Counting" button and Count Info window will pop up. Fill in Inspector and Location then tap "OK" button.
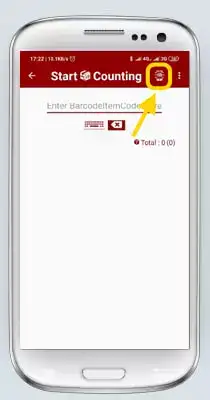
You can start counting by typing the barcode using keyboard or using barcode scanner (connected with OTG), or by using your device camera.
To activate device camera to use for scanning click on the barcode scanning icon on the top right screen
Same barcode will be sum automatically.
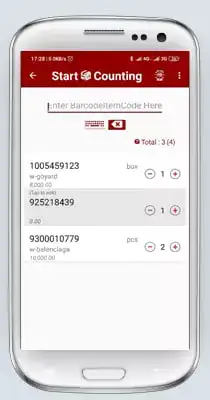
It will also show total number of item scanned (in this example is 3) and total number of quantity (in this example is 4) on the top right of item list
If there's an item that is not registerd in your master data (in this example is item "925218439"), you can add detail information (description, uom and selling price) by tapping on the item. When you tap the item, it will show "Edit Product" screen to allow you to input the item complete information.
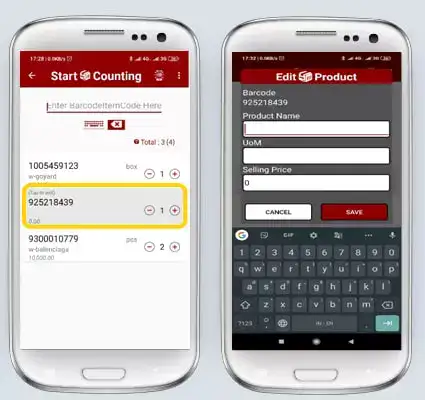
START COUNT
View Result
CloseYou can exit iREAP Stock Count application and continue your last progress. Stock Taking history can be view on "View Result" menu. Tap on any row to continue or review Stock Taking process.
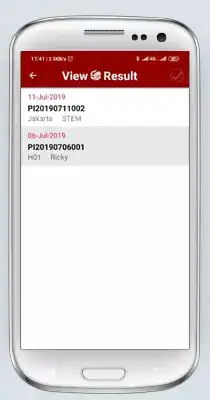
You can also share stock count result.
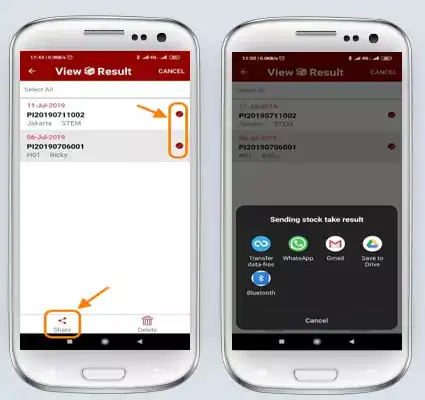
First, choose which result you want to share or send, by press and hold the result row, or by tapping on check mark icon on the top right corner to enter selection mode.
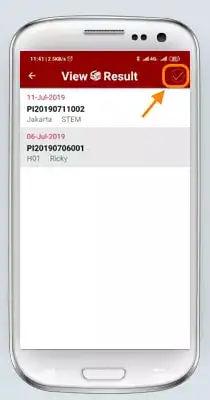
Select which result you want to send, click on "Share" icon at the bottom. Choose how do you want to share the stock count result.
